Lightning Nodes
Using this guide, you'll be able to create a new account, select a subscription plan with credits, deploy your first Lightning or Bitcoin resource, securely back up your seed phrase, set a node password, and have your node fully running — typically in under 2 minutes.
Estimated reading time: 6 minutes
Deploy and manage Lightning Network (LND) and Taproot Assets (LITD) nodes on Comet Platform. This guide covers account creation, node deployment, and initial setup.
What is Comet Platform?
Platform-as-a-Service for the Bitcoin Ecosystem
Key Benefits:
Simple Infrastructure - No DevOps expertise or hardware management required
Non-Custodial - You control private keys; client-side encryption protects sensitive data
Transparent Pricing - Credit-based model with predictable costs
Fast Deployment - Production-ready nodes in under 5 minutes
Key Concepts
Node Types
LND Nodes
Lightning Network operations for instant, low-cost Bitcoin payments. Node tier (Standard, Pro, Enterprise) determined by subscription plan.
LITD (TAPD) Nodes
Lightning Network + Taproot Assets Protocol. Mint, transfer, and manage Taproot Assets on Bitcoin while maintaining Lightning capabilities.
Coming Soon: Bitcoin Core nodes coming soon.
Credits
Credit-based pricing model instead of hourly billing:
Fixed monthly credit allocation per subscription tier
Credits continuously occupied by deployed resources (not consumed hourly)
Deleting nodes frees credits for other resources
Think capacity limit, not currency spent
Example: Basic plan includes 1,000 credits/month. Running nodes occupy credits; delete a node to free those credits.
Creating Your Account
Step 1: Sign Up
Navigate to dashboard.cometplatform.com
Enter email and click "Request OTP"
Enter 6-digit verification code from email
Click "Validate"
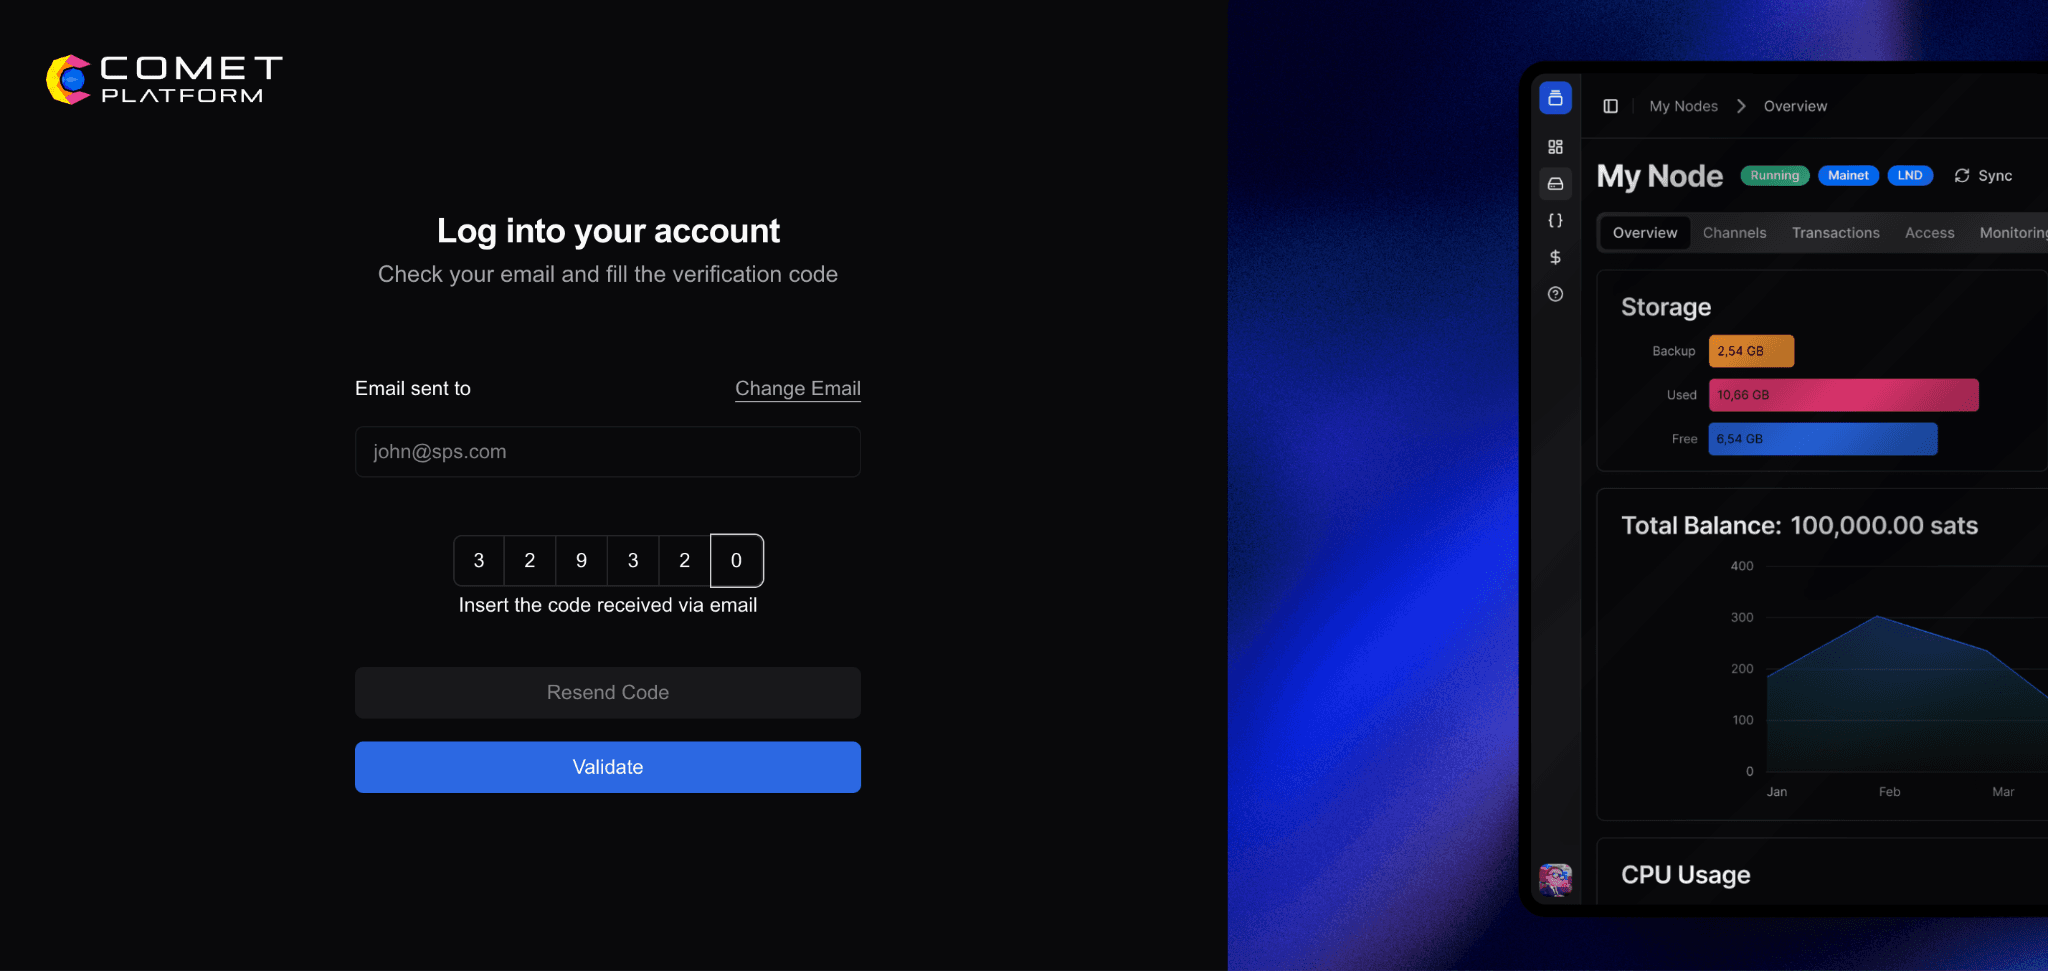
Passwordless authentication with One-Time Passwords (OTP) for security.
After successful authentication, new users will complete account creation:
Enter your full name
Provide your company name
Select your country from the dropdown menu
Click "Sign Up" to proceed
⚠️ Security: Maintain reliable email access. Enable 2FA on your email provider.
Step 2: Choose Subscription Plan
Choose between available subscription plans:
Select billing frequency (Monthly/Annually)
Click "Continue with [Selected Plan]" to proceed
Yearly Plans (discounted):
Basic ($300/year): Save $60/year
Pro ($2,000/year): Save $400/year
Enterprise ($10,000/year): Save $2,000/year
Upgrade or downgrade anytime from Billing page.
Step 3: Add Payment Information
Choose payment method
Enter card details securely (if paying by Credit/Debit Card)
Review subscription details
Click "Pay Now" to complete payment
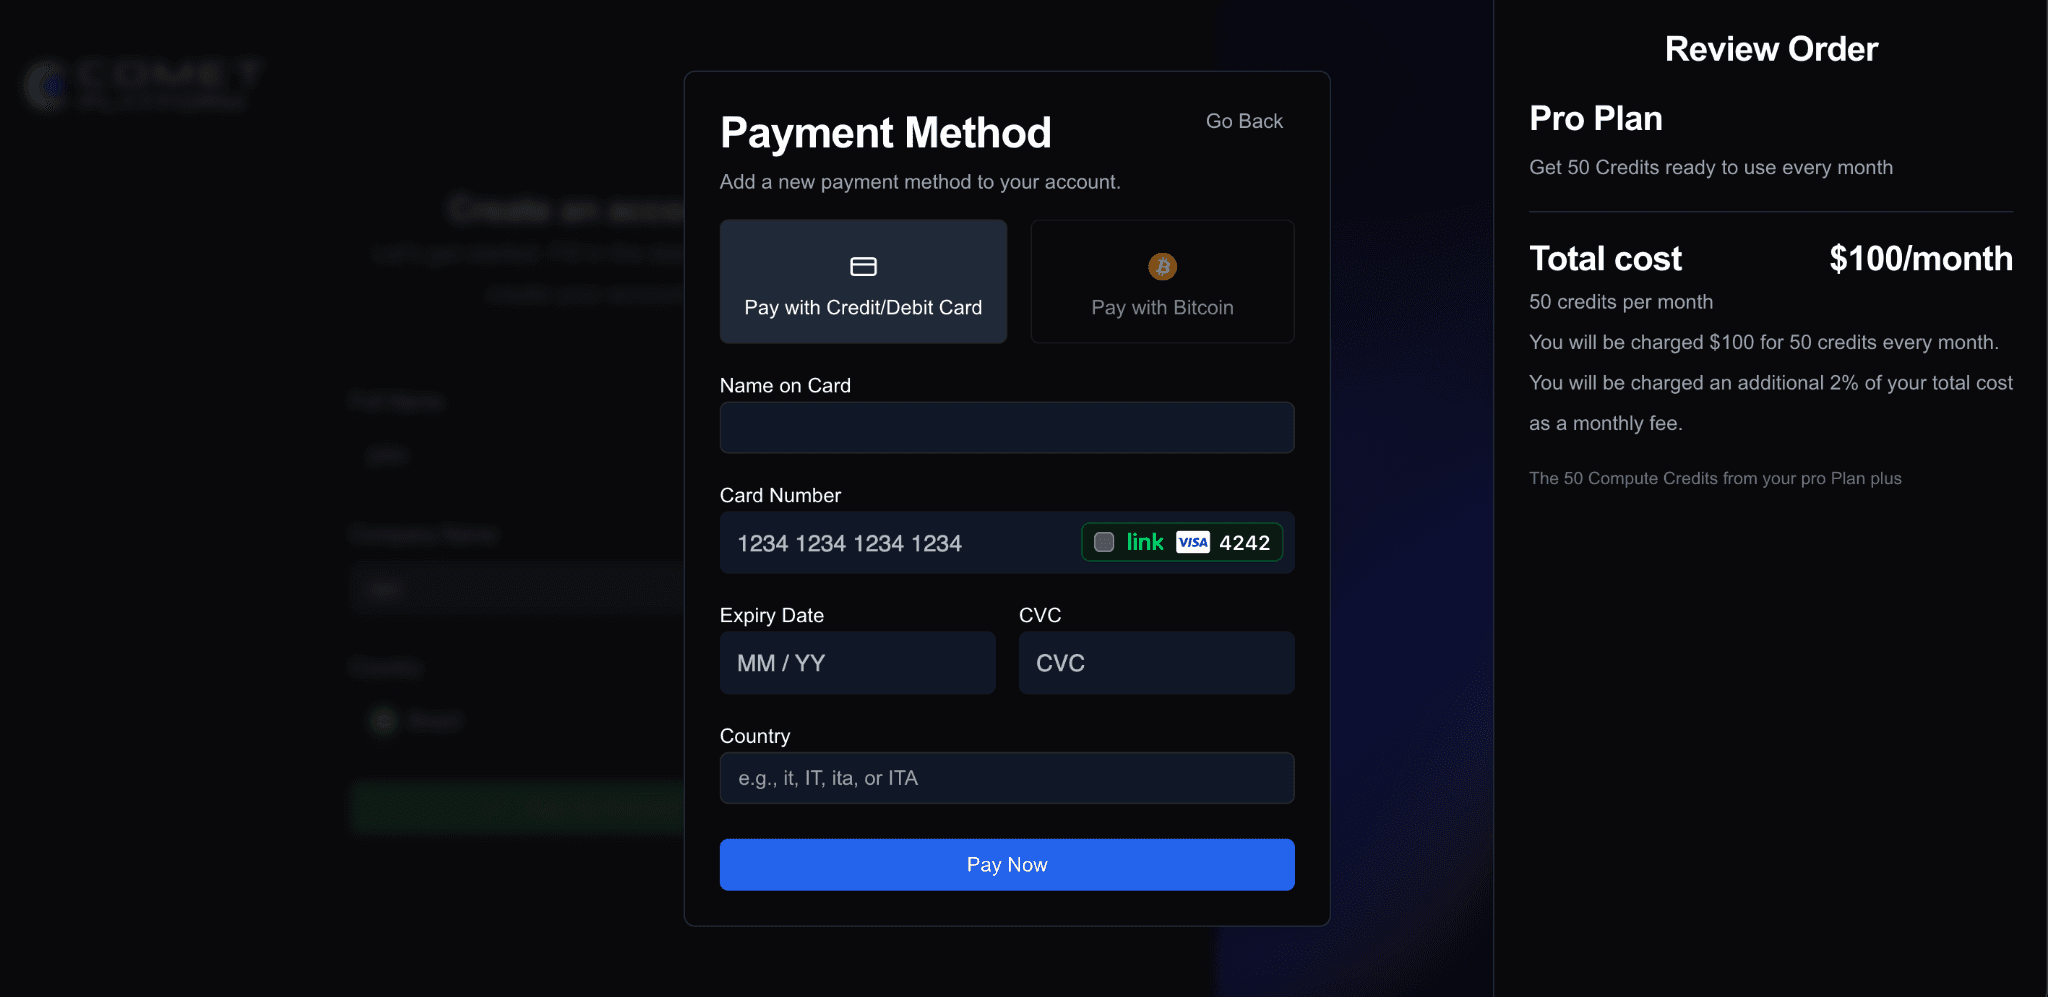
Subscription begins immediately with credits available for node deployment.
📘 Note: Credit consumption rates subject to change. Check Billing page for current rates.
Step 4: Node Deployment
During the first-time setup flow, you can deploy your first node immediately:
Select node type:
Configure node settings:
For Bitcoin nodes, set a secure RPC password
Click "Confirm" to deploy
📘 Note: You can skip node deployment during initial setup and create nodes later from the "My Nodes" page. See the "Creating Your First Node" section below for detailed node creation instructions.
Step 5: Seed Phrase Management (LND & LITD Nodes)
If you deployed an LND or LITD node during setup, you'll proceed through seed phrase management:
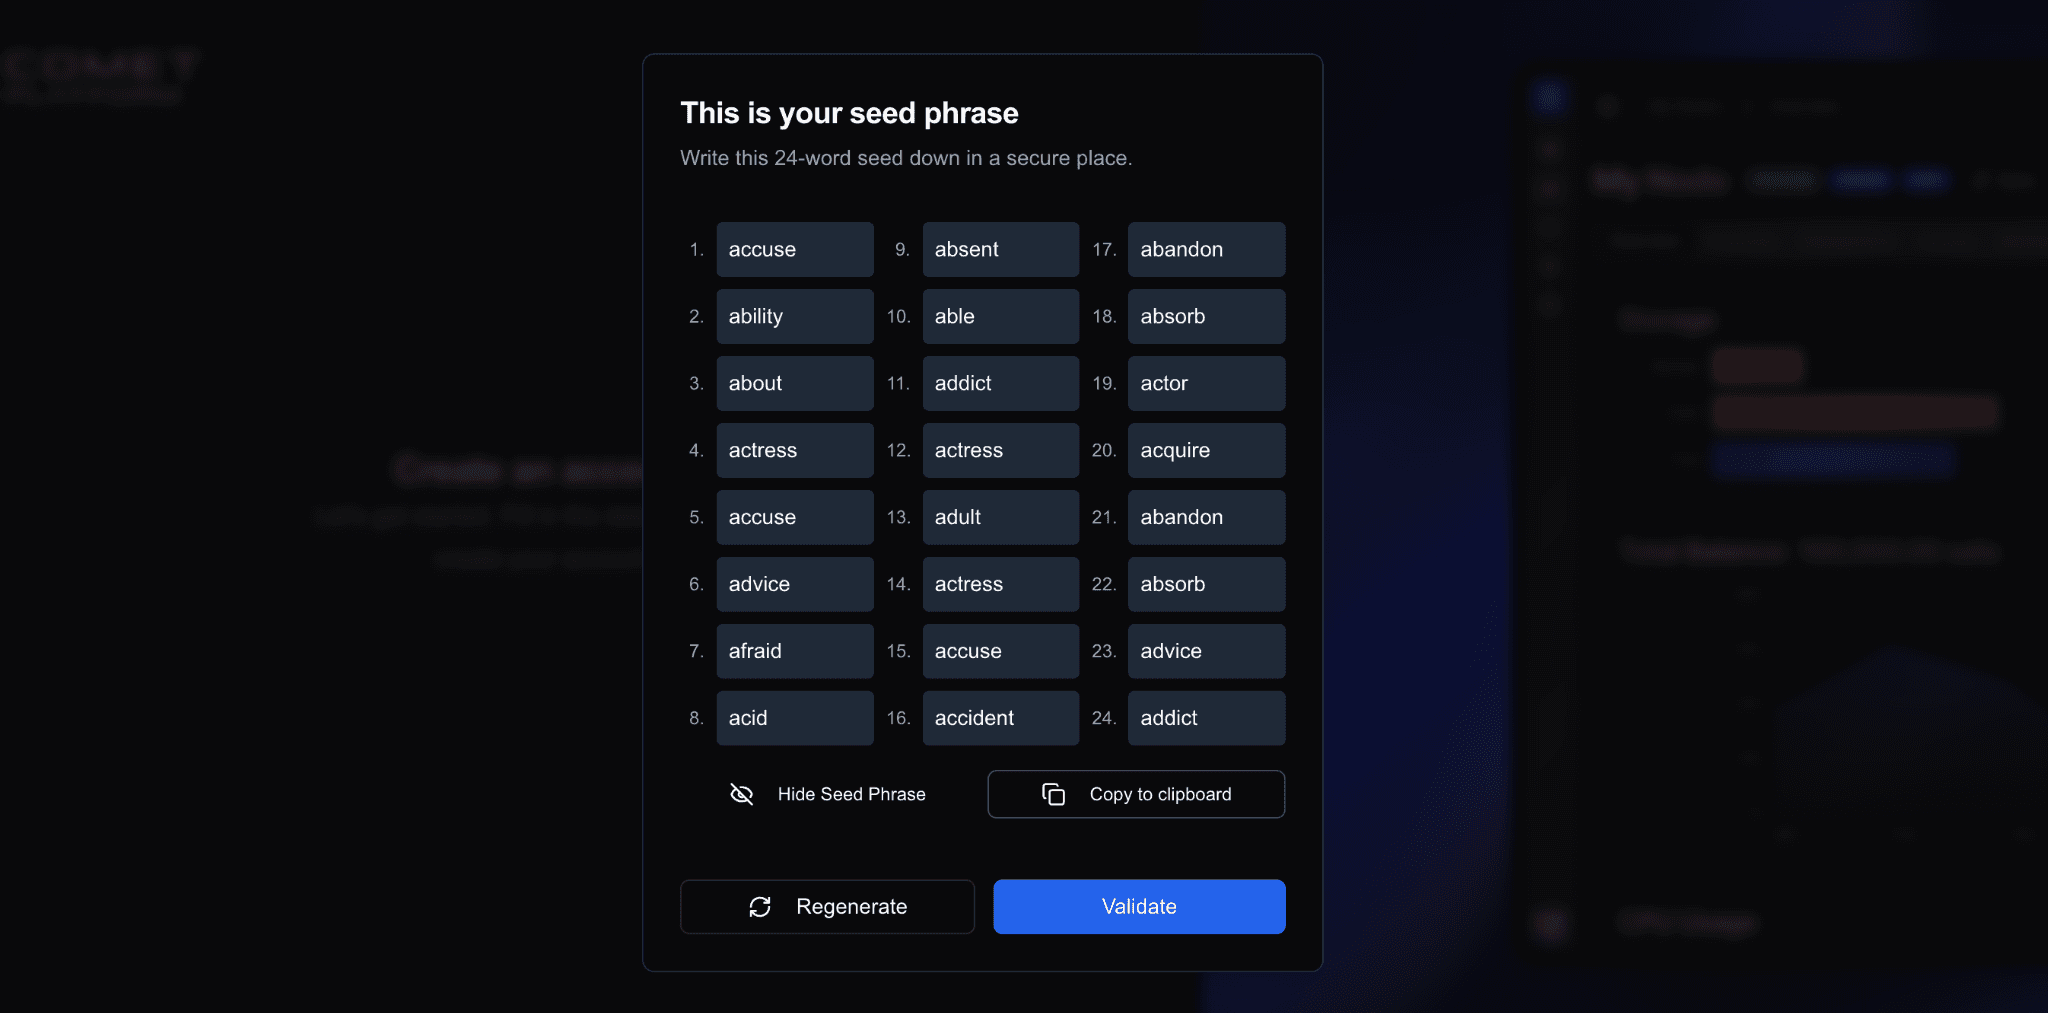
View your generated seed phrase (it will only be shown once)
Securely store the seed phrase - click "Copy to clipboard" to save
Validate the seed phrase to confirm you've saved it correctly
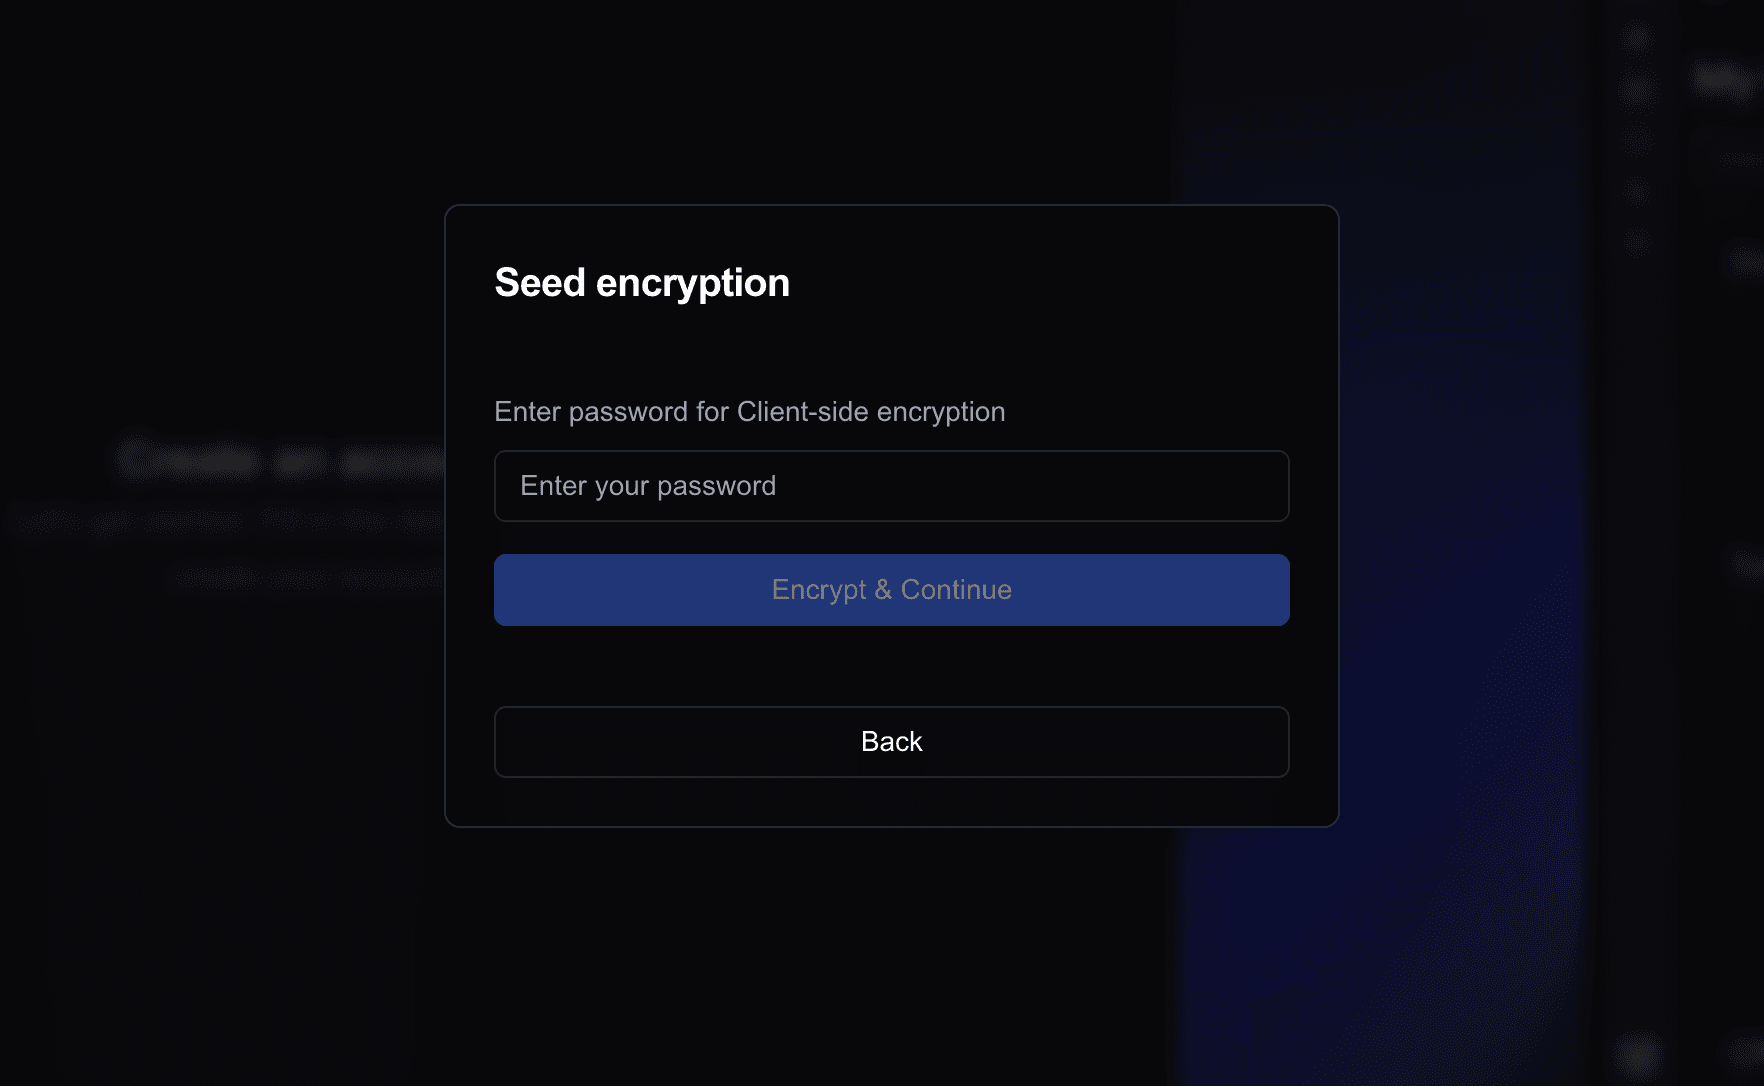
Complete seed phrase encryption to secure your wallet
⚠️ Critical: Seed phrase is master key to wallet. Store securely offline. Never share or enter on untrusted sites.
Step 6: Create Node Password
Set password to unlock node and encrypt sensitive data.
⚠️ Important: Different from account login (OTP). Store in password manager with offline backups. Without it, you'll need seed phrase for recovery.
After completing these steps, your node will begin provisioning. Once provisioning is complete, you'll be redirected to the node details page to unlock it. See the "Creating Your First Node" section below for unlocking instructions and node management details.
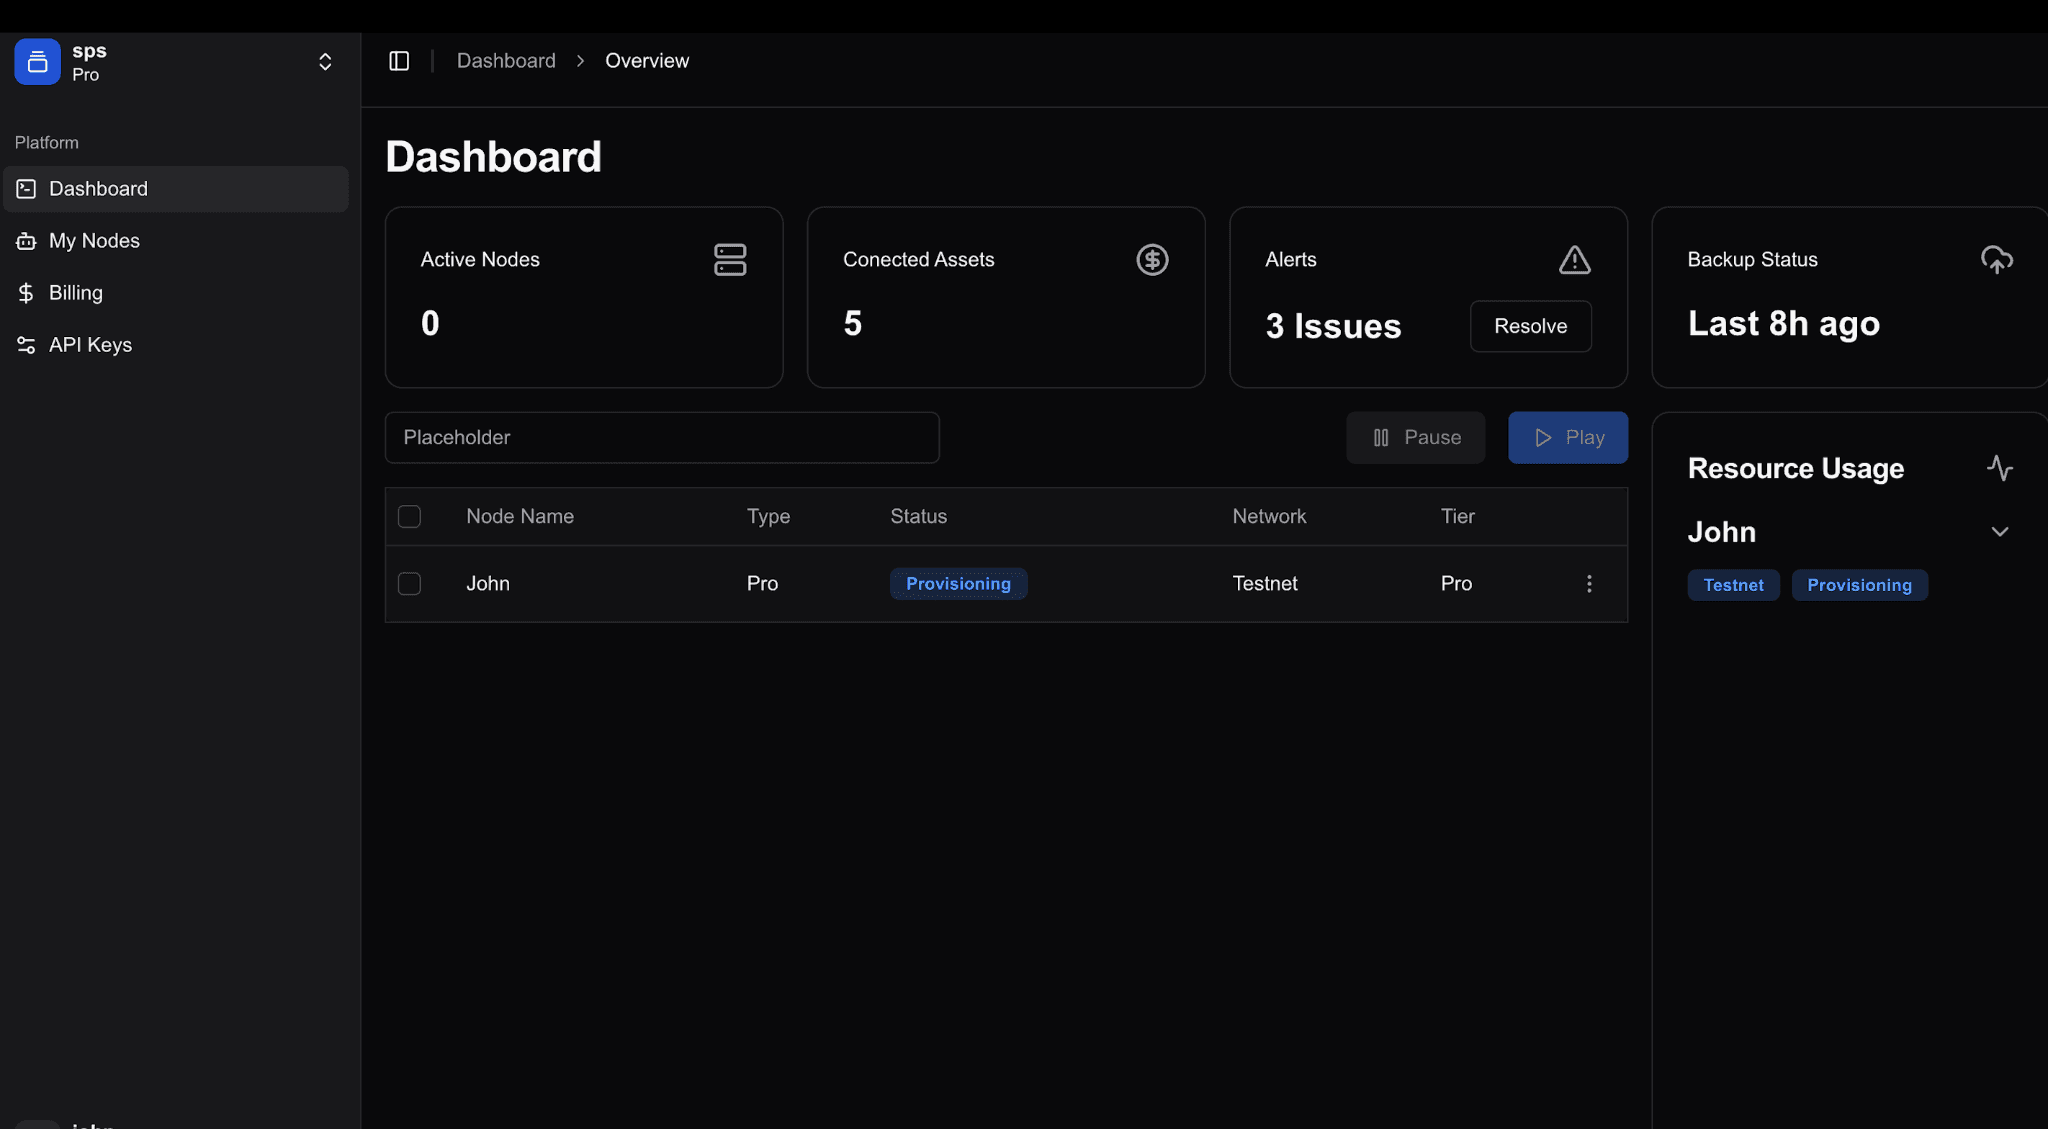
Dashboard Overview
Left Sidebar Navigation:
Dashboard - Node overview and credit usage
My Nodes - View and manage deployed nodes
Billing - Invoices, plan details, subscription management
API Keys - Create and manage programmatic access
User Profile Menu (bottom left):
Upgrade subscription, account settings, billing, notifications, logout
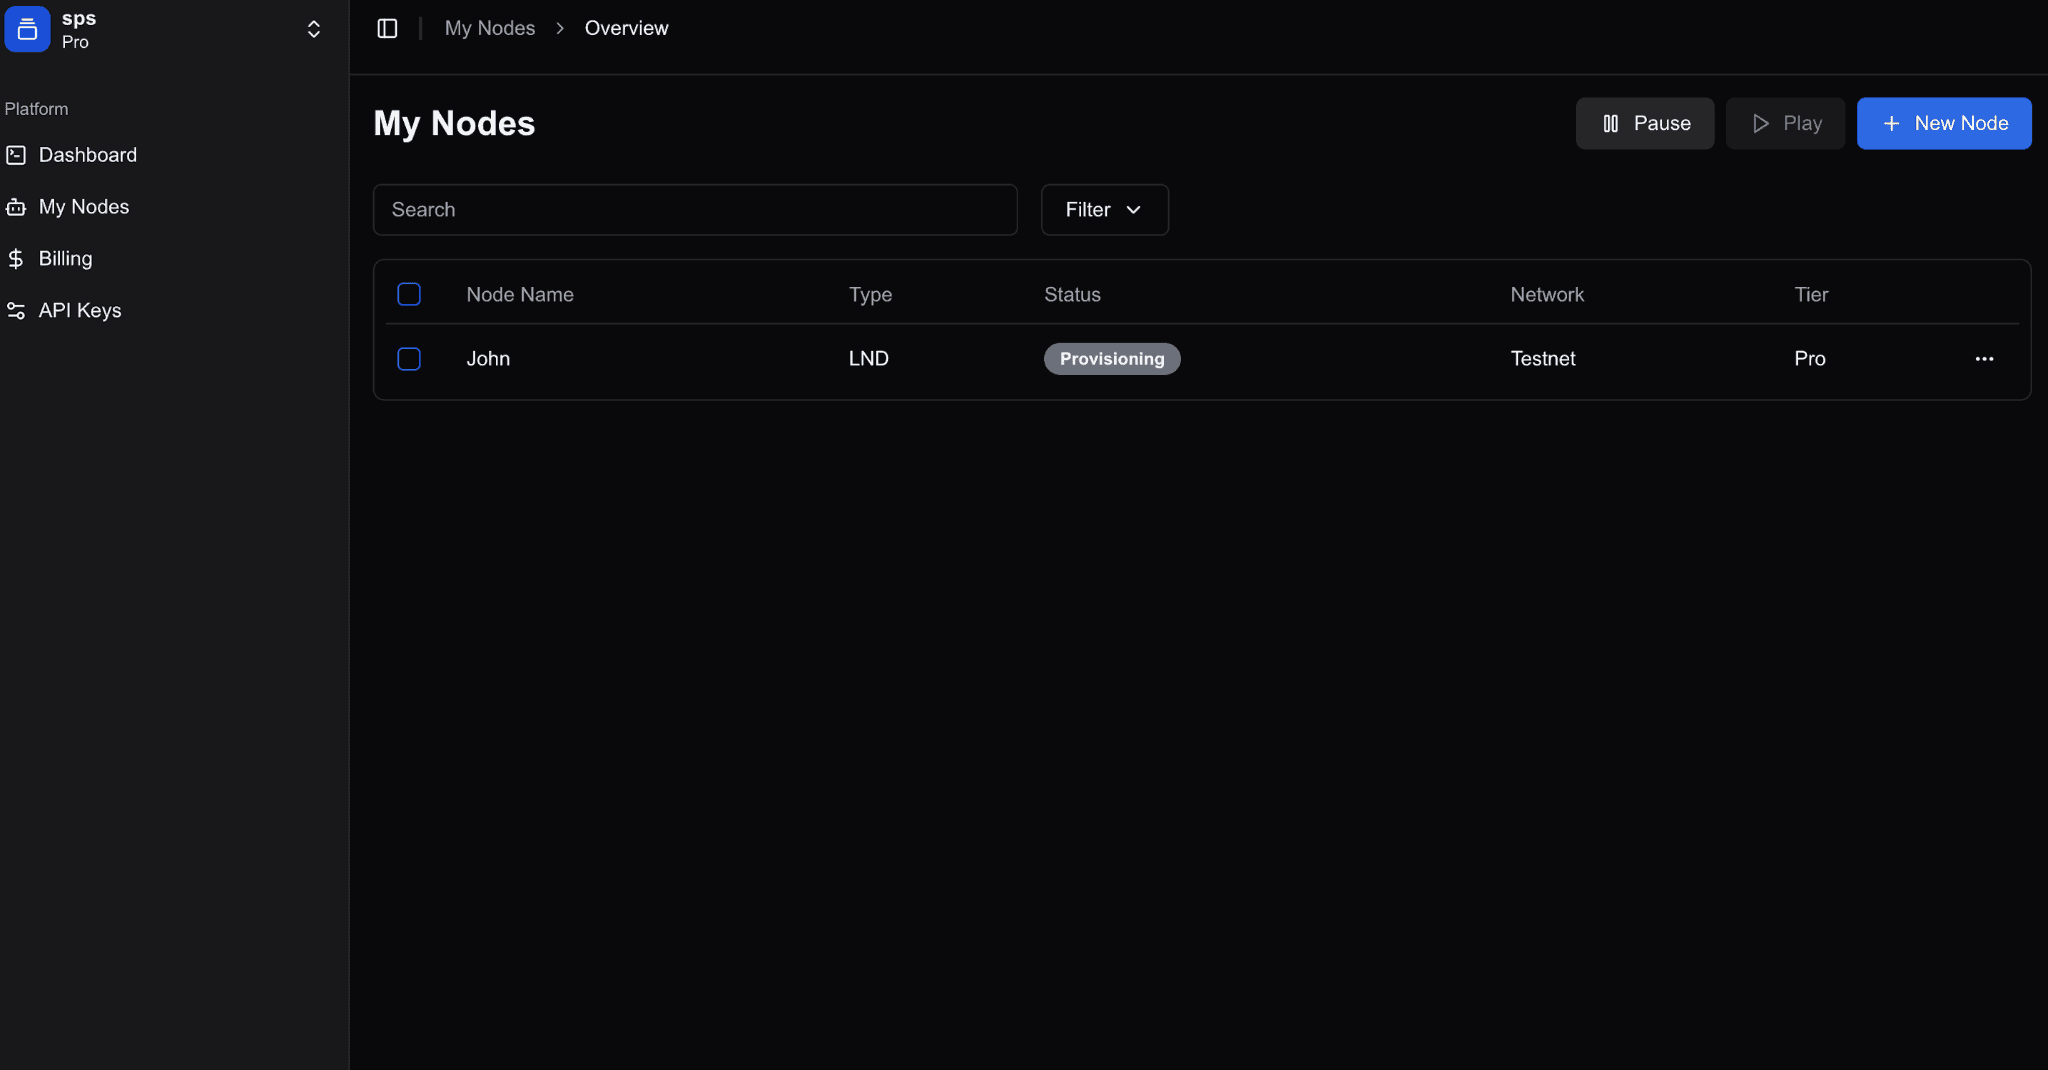
Main Dashboard:
Search bar for finding nodes by name
Filters: status, network (Mainnet/Testnet), tier
Bulk operations: Pause/Play buttons
Node list with Name, Type, Status, Network, Tier
Right Sidebar:
Active node count
Credits in use (with progress bar)
Next billing date
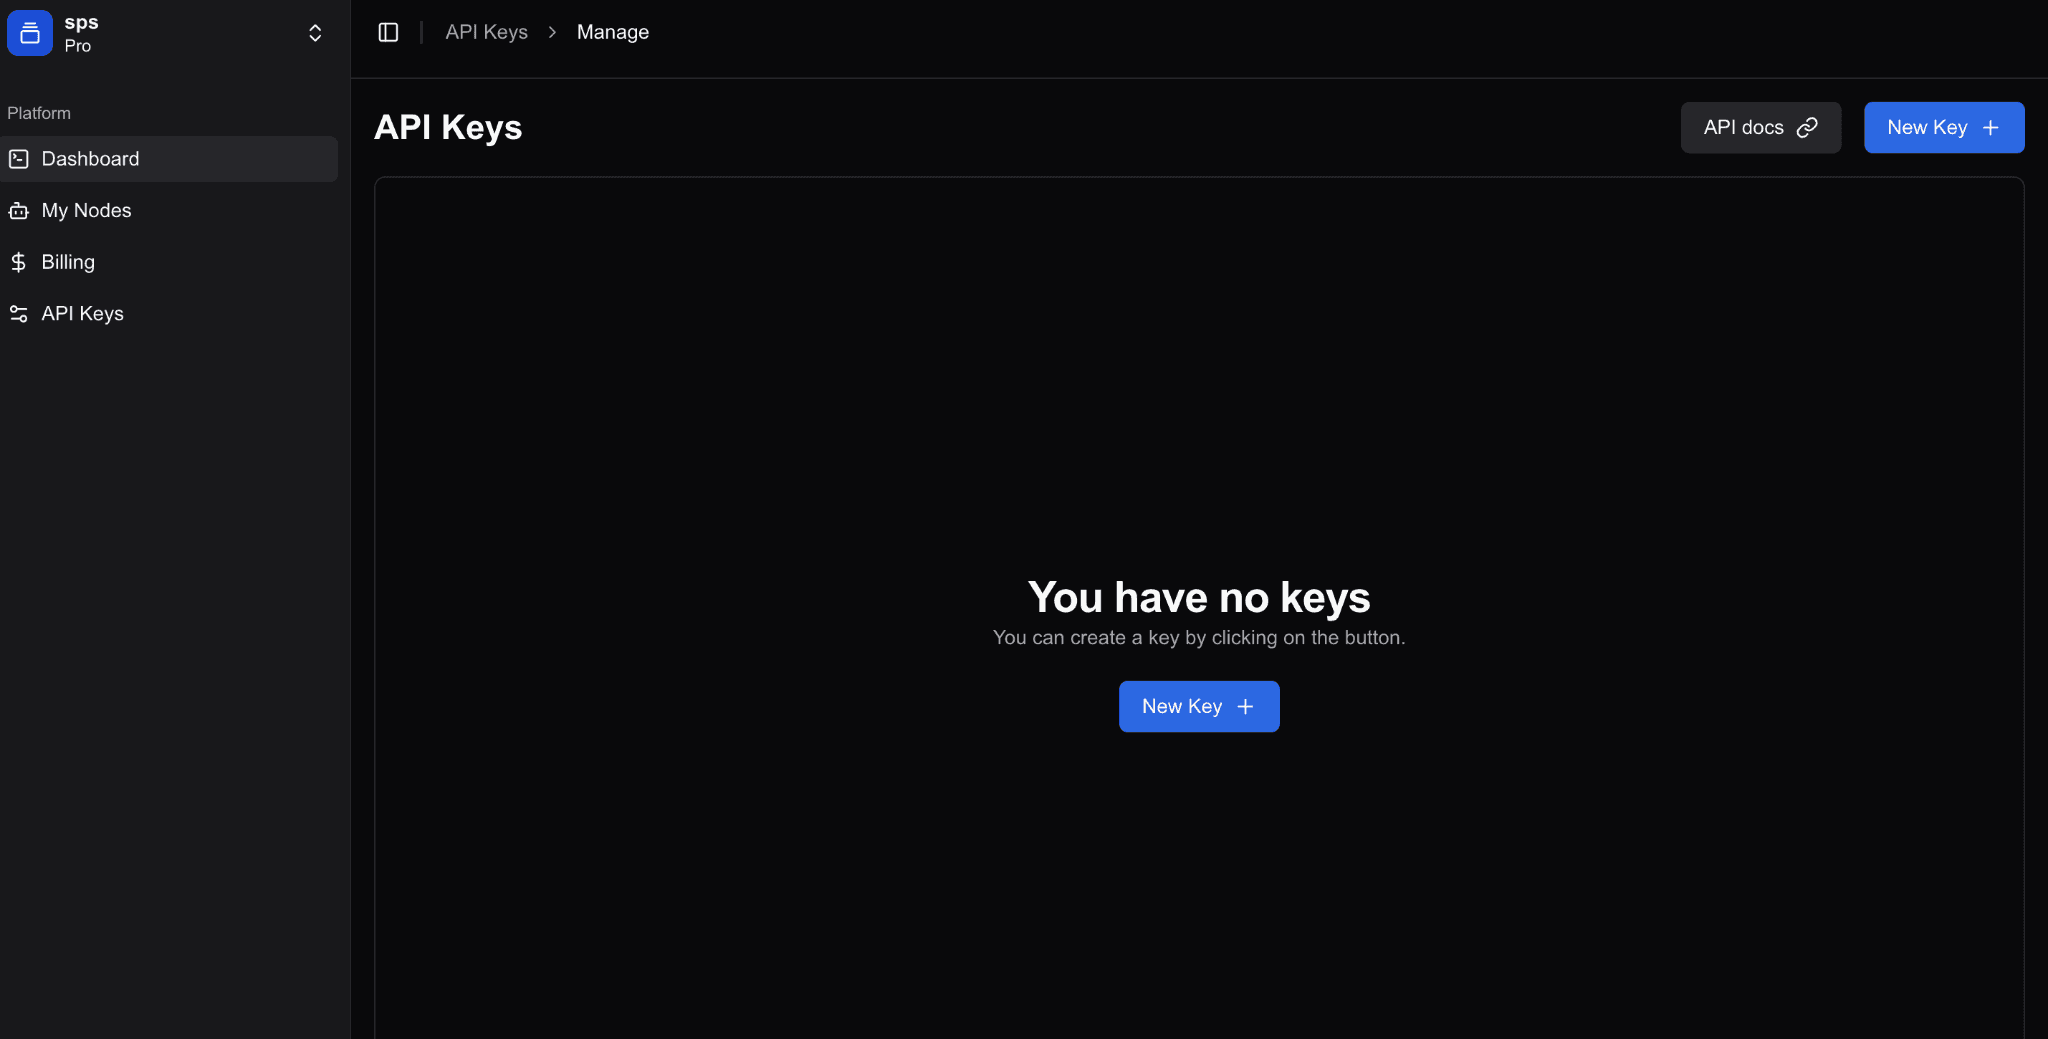
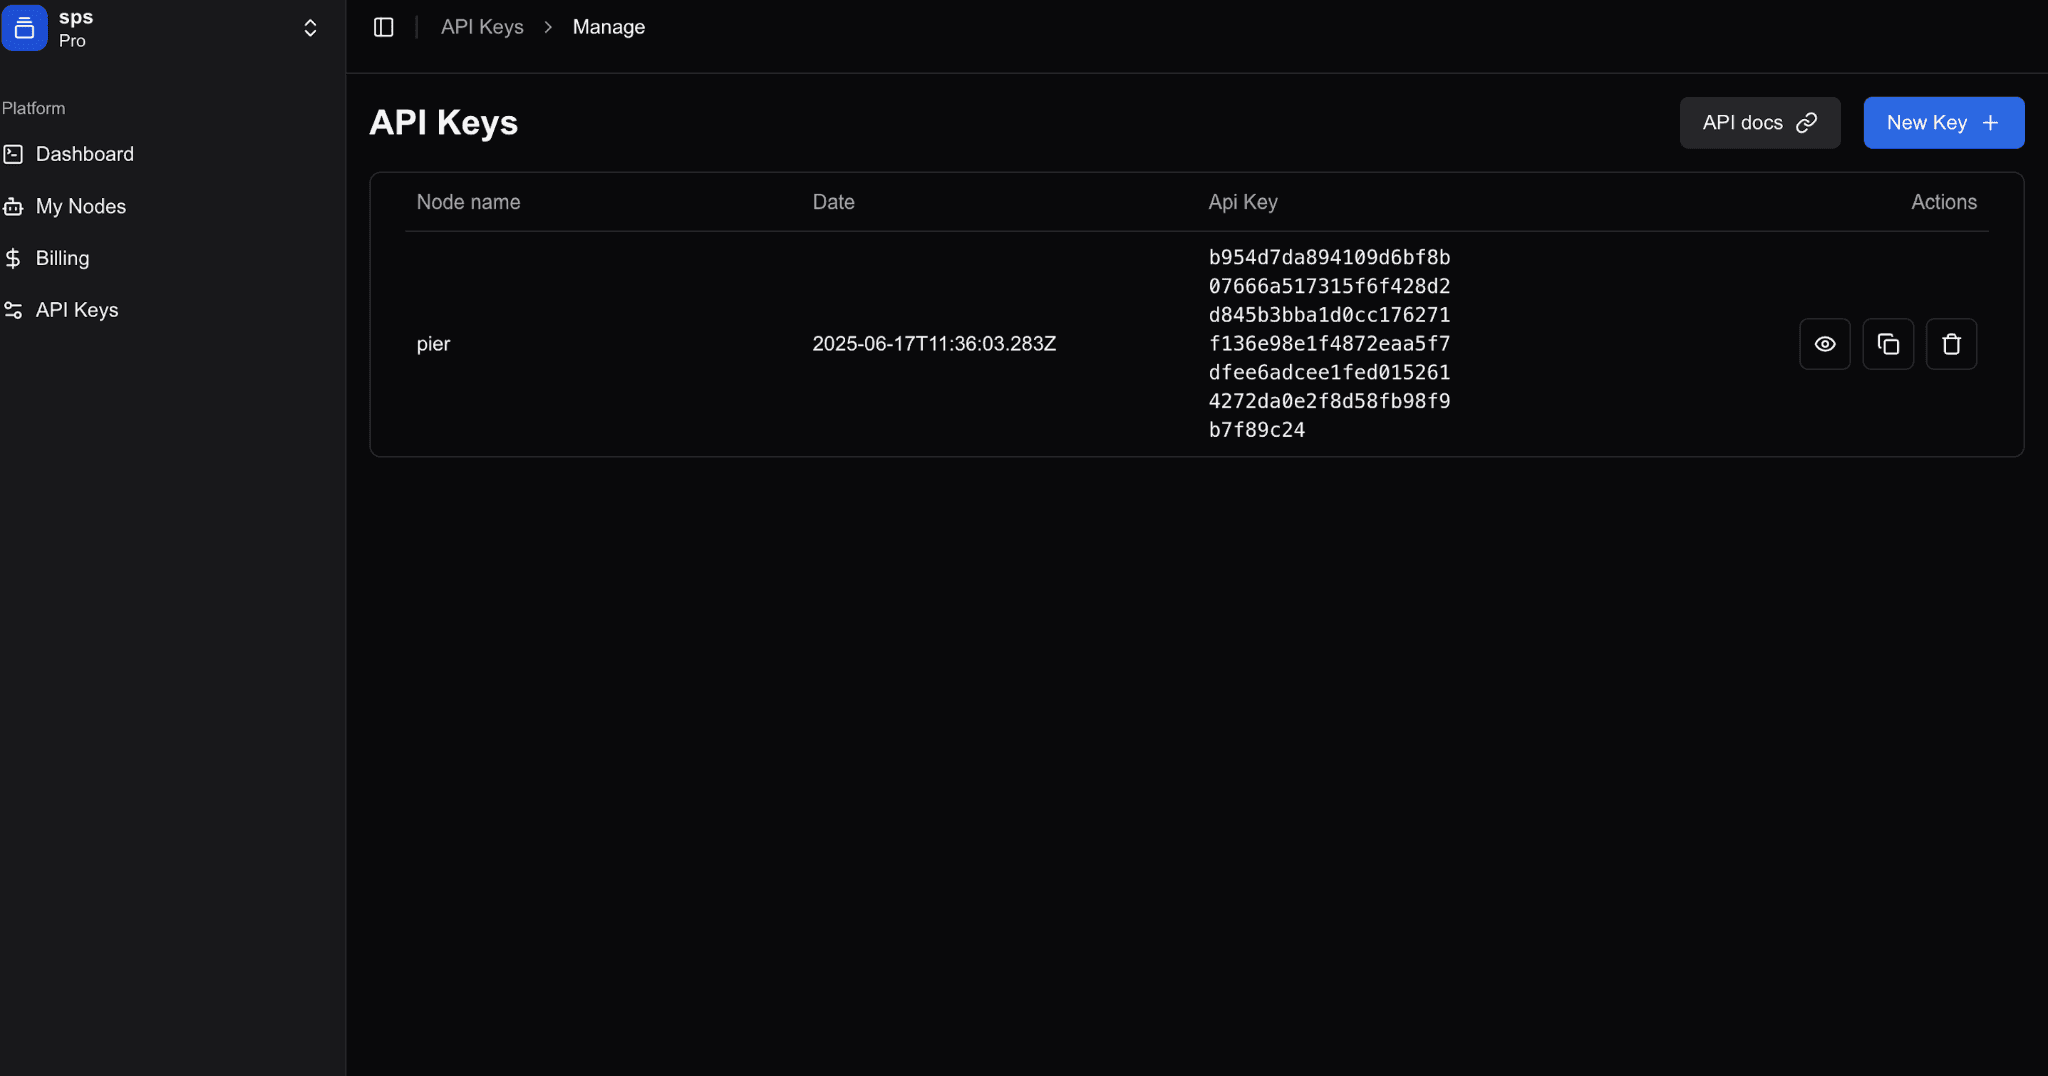
API Key Management
Create and manage API keys for programmatic access to your nodes:
Navigate to the API Keys section
View existing API keys and their status
Click "Create API Key" to generate a new key
Give your API key a descriptive name (e.g., "MyFirstCLIKey", "DevSDKKey")
Copy and securely store the API key immediately (it will only be shown once)

⚠️ Security: Treat your API keys like passwords. Do not share them publicly or commit them to version control.
Billing Management
Access your billing information to:
View current subscription plan
Monitor credit usage and remaining balance
Manage payment methods
View billing history and invoices
Upgrade or downgrade your subscription plan
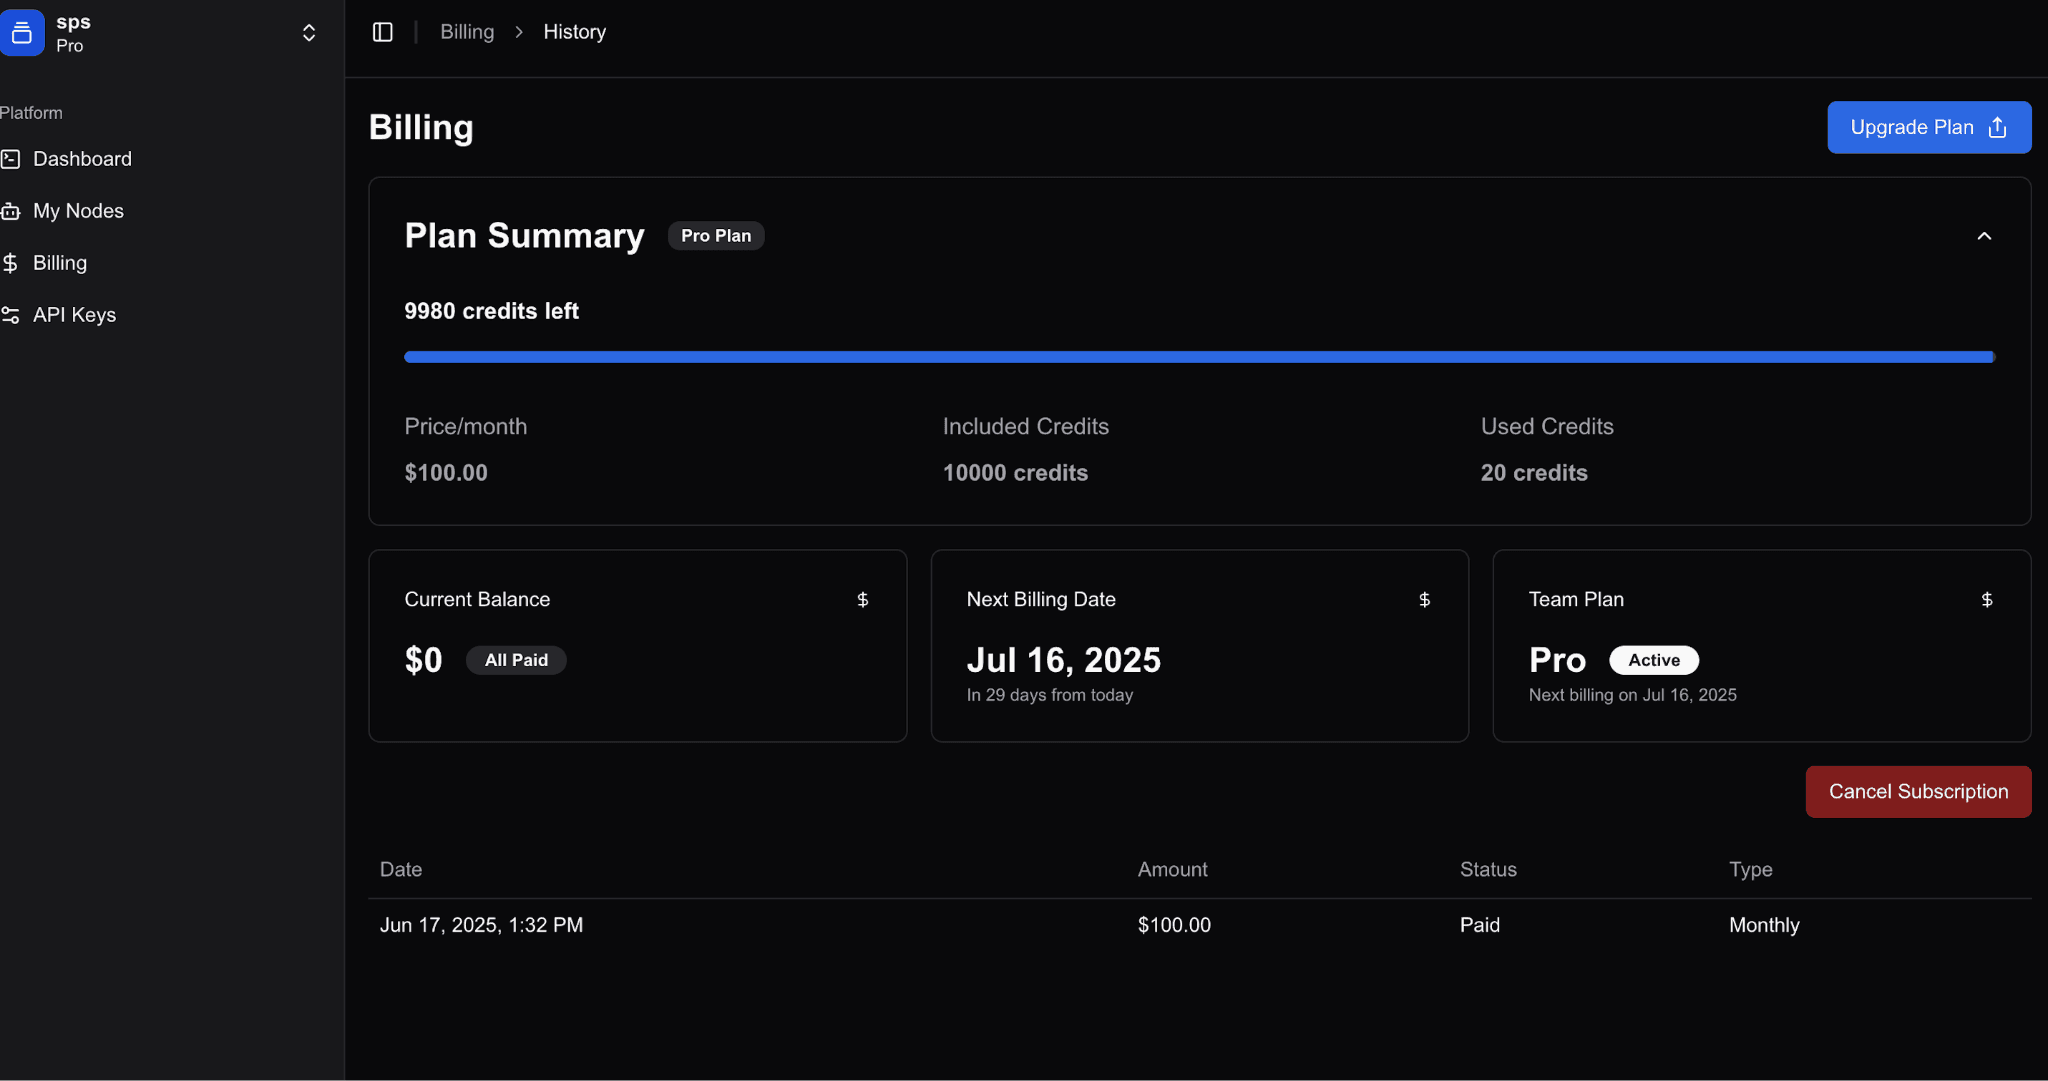
Navigate to the Billing section from the left sidebar to manage all billing-related activities.
Node Management
Return to your nodes to:
Monitor node status and health
Access detailed node information
Perform node actions (pause, resume, delete)
View node metrics and performance data
Manage node configurations
Navigate to "My Nodes" from the left sidebar to view all deployed nodes and access individual node details.
Creating Your First Node
Step 1: Navigate to Node Creation
From "My Nodes" page, click "+ New Node" button.

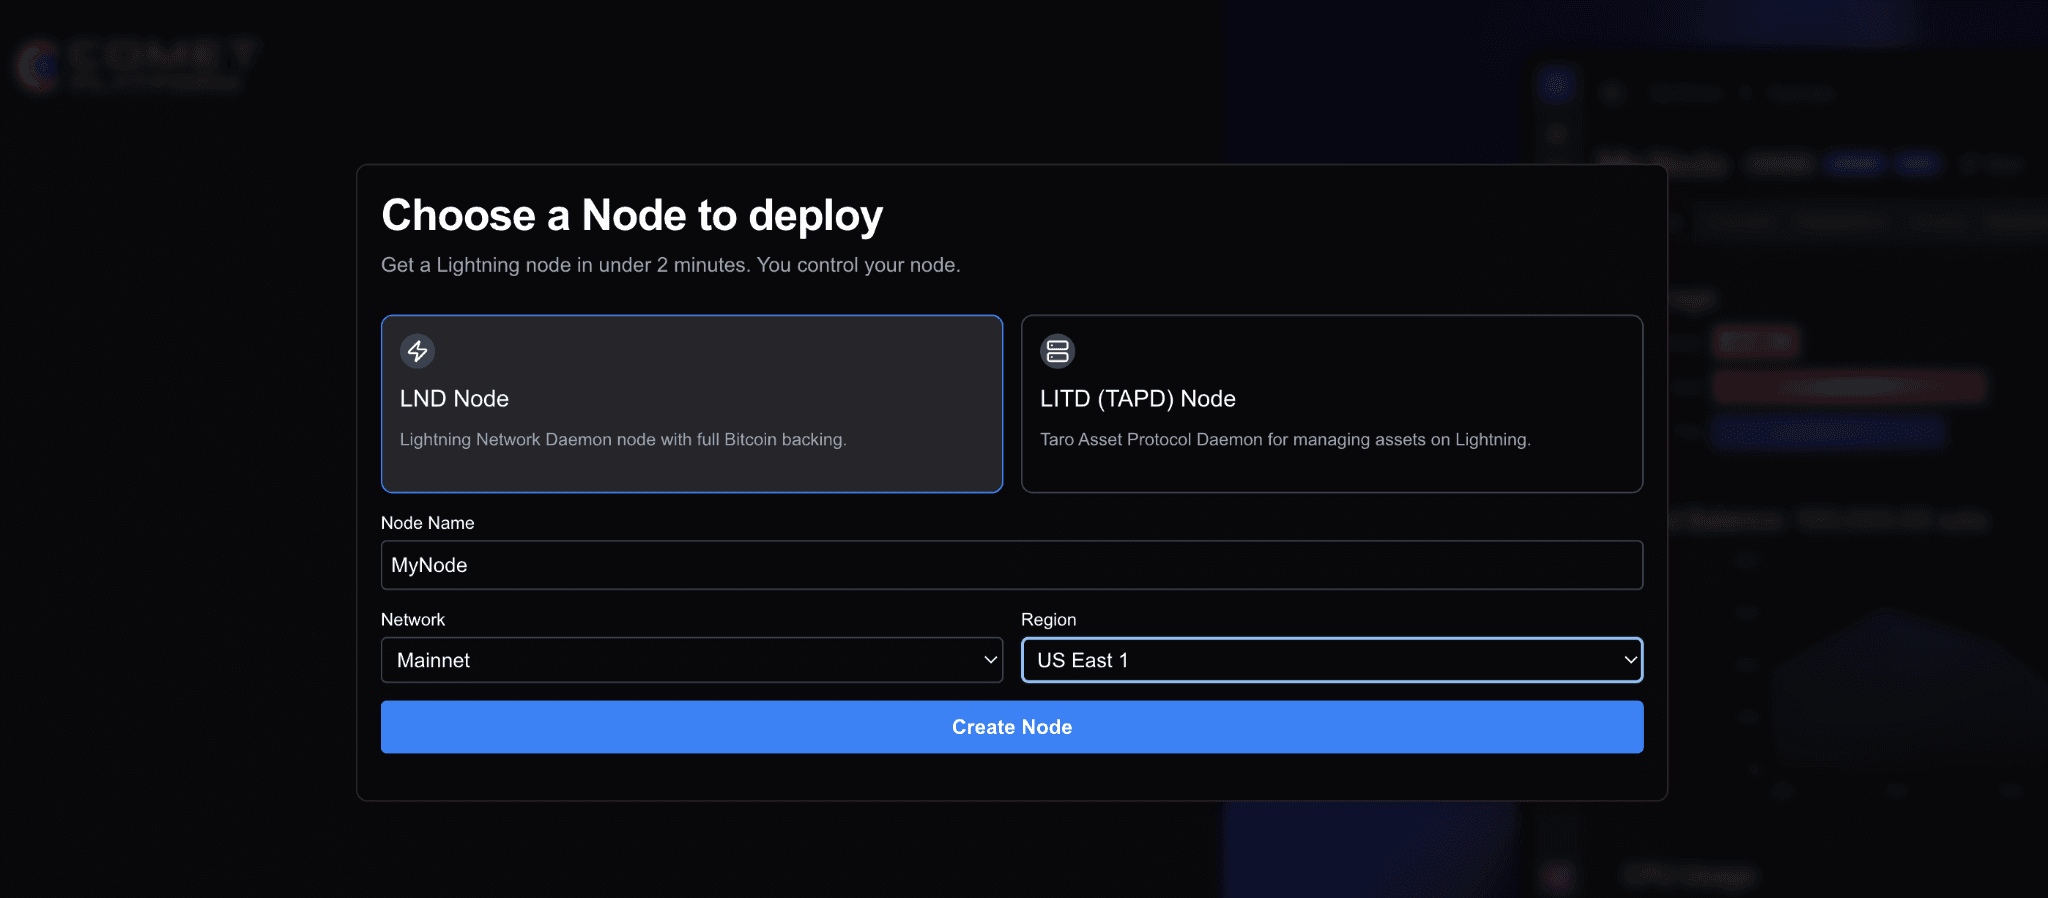
Step 2: Configure Node
Name
Descriptive name (e.g., "My First Lightning Node")
Type
LND Node - Lightning Network operations
LITD (TAPD) Node - Lightning + Taproot Assets
Network
Mainnet - Production use with real Bitcoin
Testnet - Development and testing
Recommendation: Select Testnet for first node.
Region
US East 1 (currently only available region)
Step 3: Create Node
Click "Create Node". Platform begins provisioning.
Step 4: Enter Seed Phrase
Import existing seed phrase or generate new one.
⚠️ Critical: Seed phrase is master key to wallet. Store securely offline. Never share or enter on untrusted sites.
Seed Phrase Validation:
View your generated seed phrase (it will only be shown once)
Securely store the seed phrase - click "Copy to clipboard" to save
Validate the seed phrase to confirm you've saved it correctly
Complete seed phrase encryption to secure your wallet
Step 5: Create Node Password
Set password to unlock node and encrypt sensitive data.
⚠️ Important: Different from account login (OTP). Store in password manager with offline backups. Without it, you'll need seed phrase for recovery.
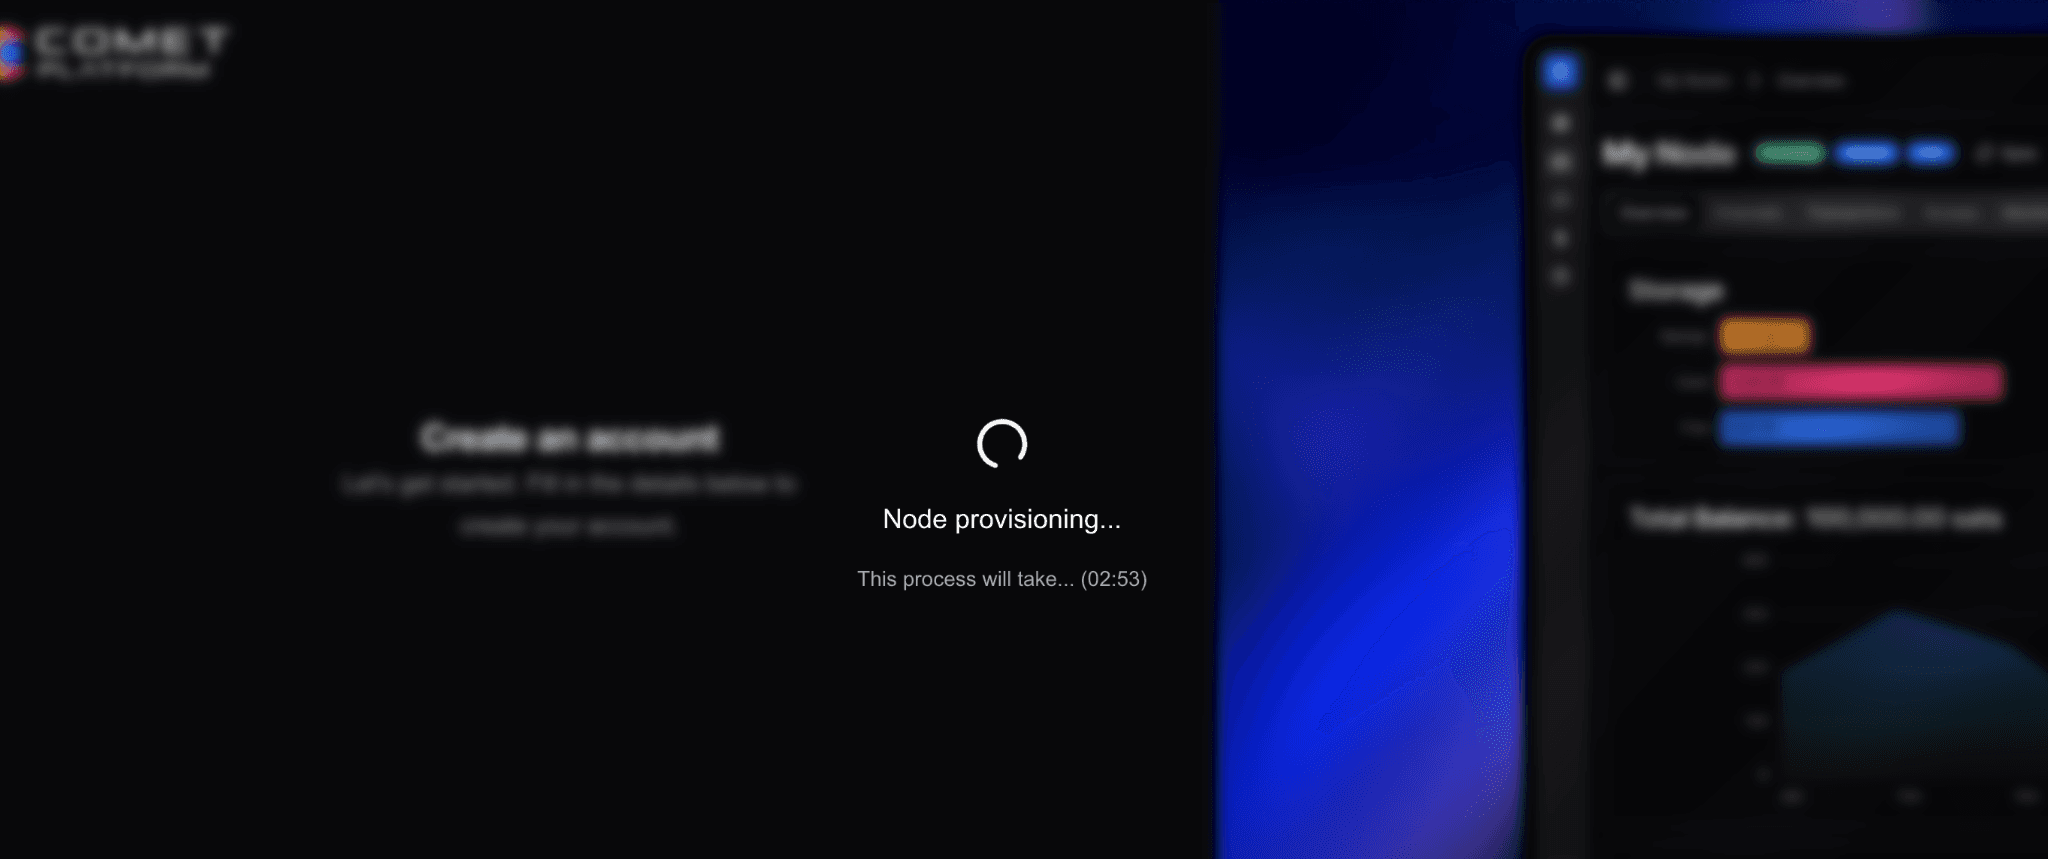
Step 7: Node Provisioning
Deployment process:
Allocate infrastructure resources
Initialize LND node
Set up wallet encryption
Generate authentication credentials (macaroons)
Configure network connections
Typically completes in under 5 minutes.
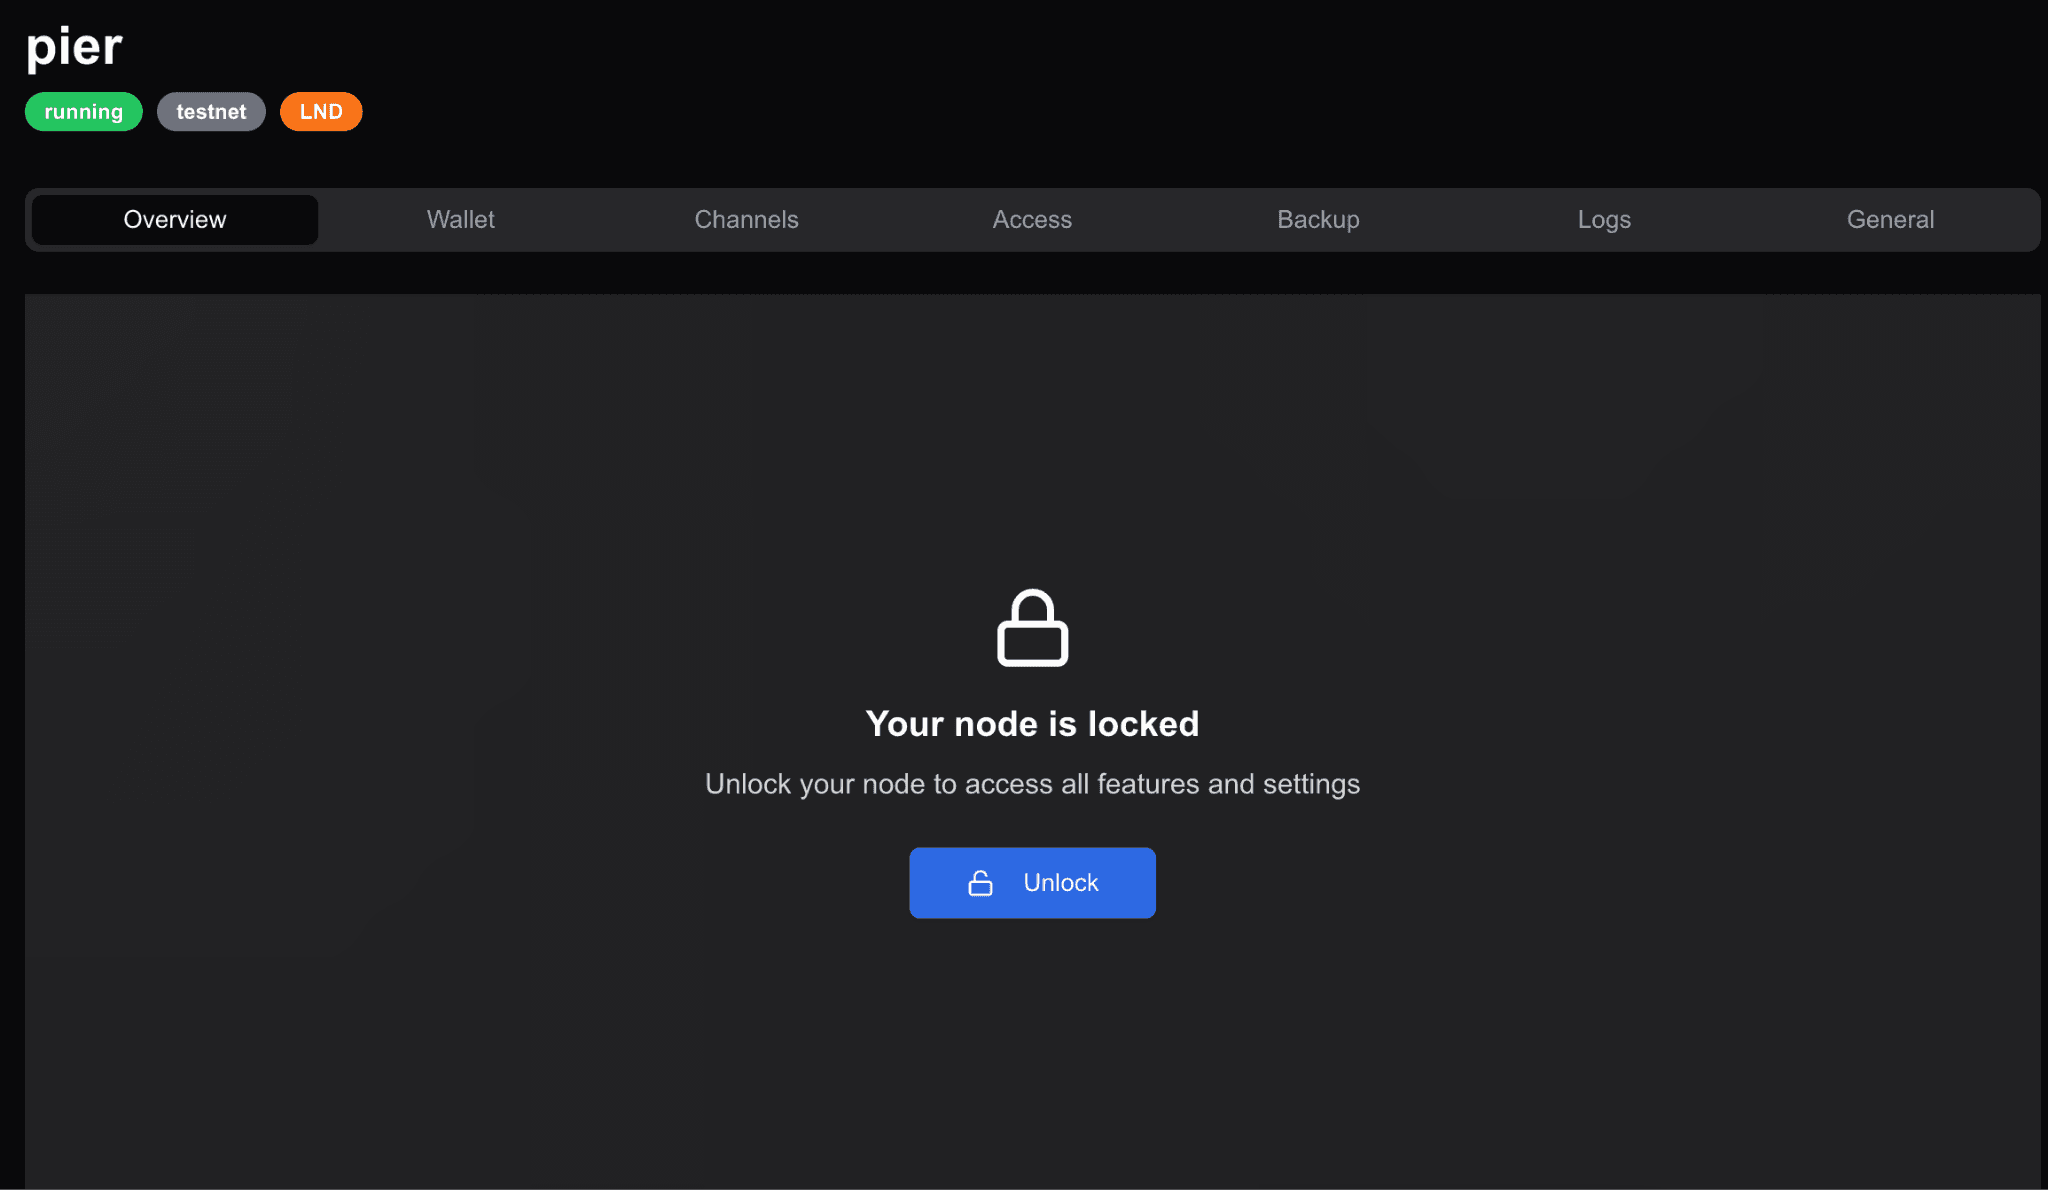
Step 8: Unlock Node
After completing the setup process, you'll be automatically redirected to the node details page for your newly created node.
Step 1: Node Details Page
You'll be automatically redirected to the newly created node page
Review the initial node status and configuration
Click the "Unlock Node" button to proceed
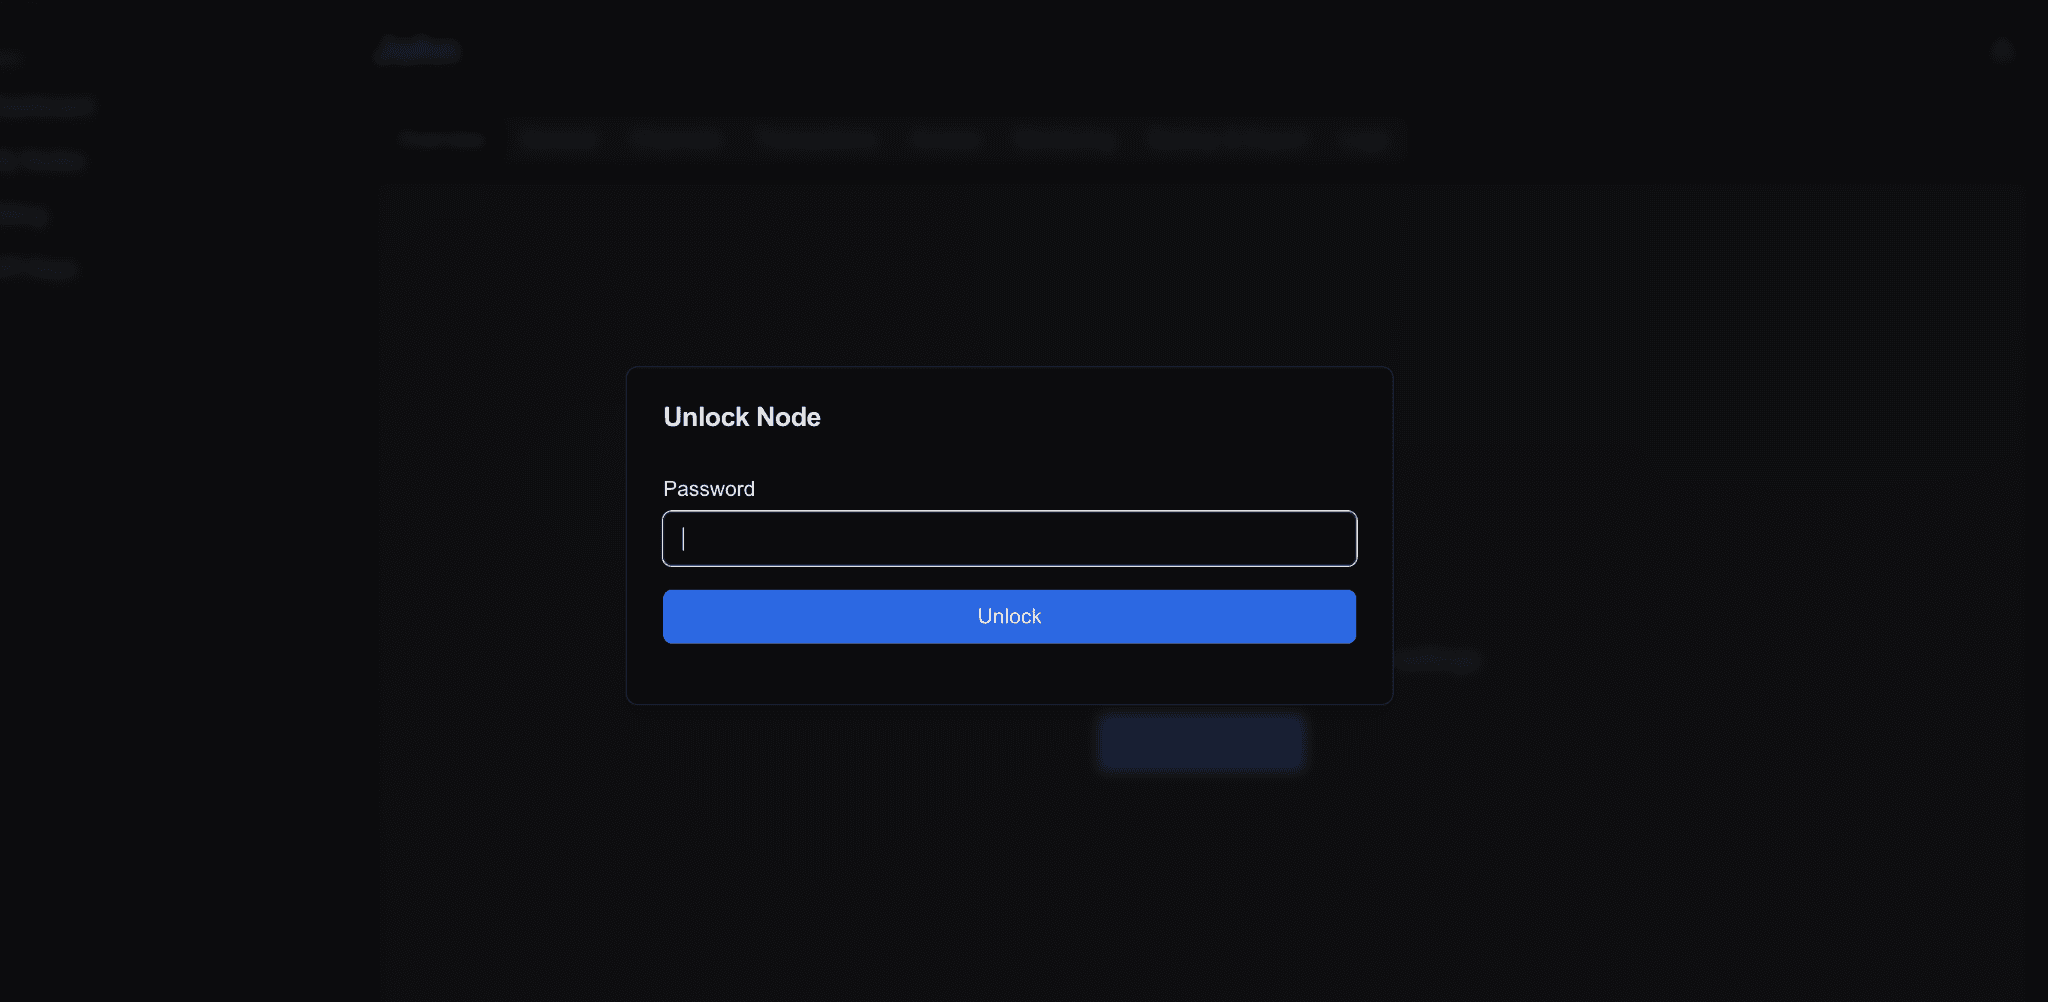
Step 2: Node Unlocking
Enter the password you set during node deployment
Click "Unlock" to proceed
Wait for the node to complete the unlocking process
Step 3: Unlock Confirmation
View the successful unlock confirmation
The node will now be fully operational and begin syncing with the Bitcoin network
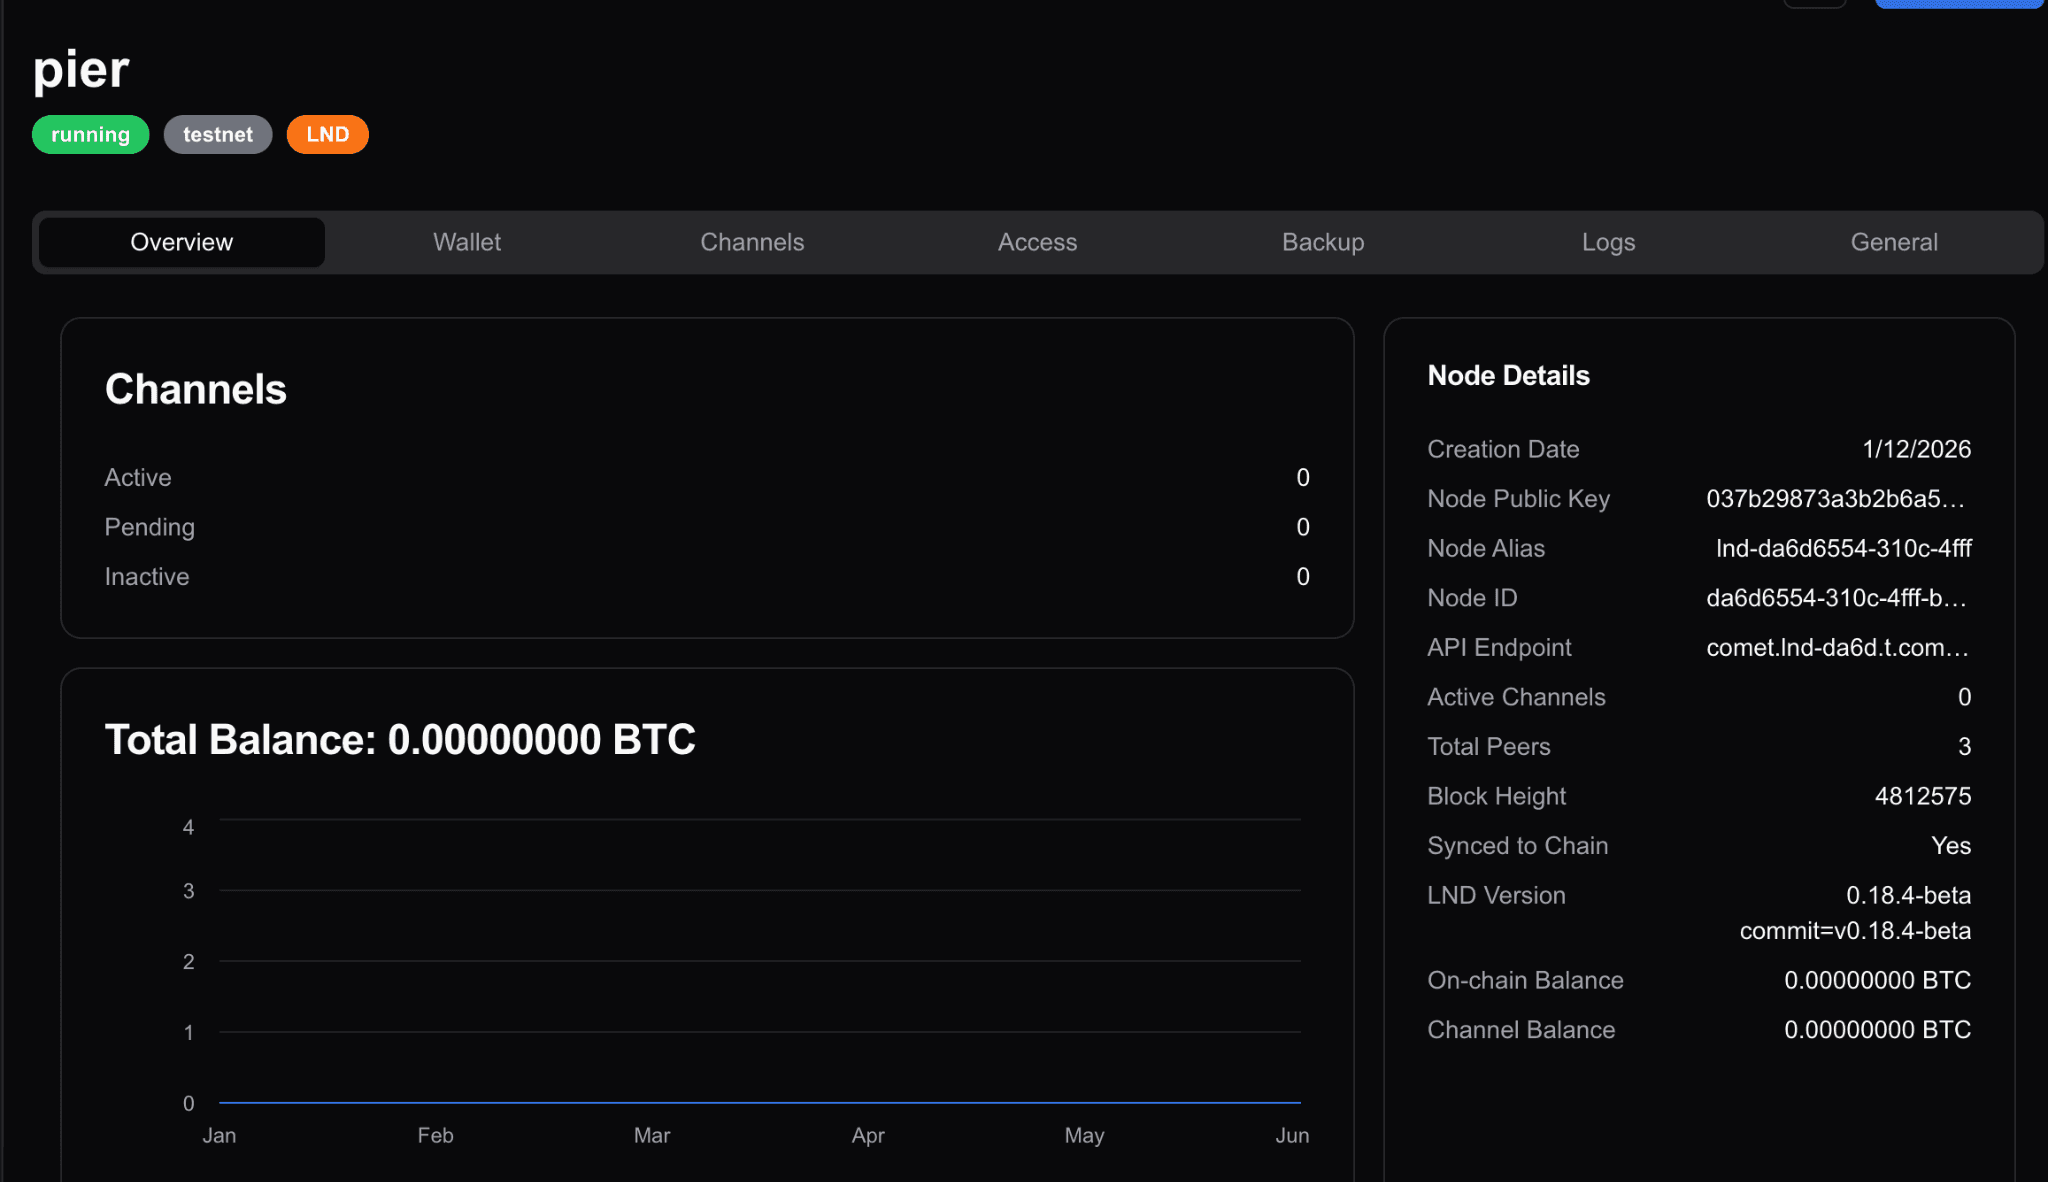
Step 9: Access Credentials
Node Interface Tabs:
Overview - Status, sync progress, metrics
Wallet - Manage Lightning wallet and on-chain funds
Channels - Open, manage, close Lightning channels
Access - Connection details and credentials
Backup - Download encrypted backups
Logs - View logs for debugging
General - Configure settings
Authentication: Node uses macaroons for authentication. Default admin.macaroon has full permissions. Create custom macaroons with "Bake Macaroon" feature in Access tab.
⚠️ Security: Store macaroons securely. They provide API access and should be treated like passwords.
Understanding Credits
How Credits Work
Credits occupied based on node type and tier. Dashboard right sidebar shows:
Total credits (e.g., 1,000 for Basic plan)
Credits in use
Progress bar visualization
📘 Note: Check Billing page for current consumption rates and detailed usage.
Credit Continuity
Credits are capacity, not usage:
Monthly subscription provides fixed credit capacity
Resources continuously occupy credits
New billing cycle: existing nodes continue occupying same credits
Fixed subscription fee each month
Freeing Credits
Delete unused nodes to make credits available:
Credits become immediately available after deletion
Deploy new resources with freed credits
No prorated refund (capacity-based pricing)
Low Credit Alerts
Alerts trigger when available credits drop below threshold (default: 10%). Options:
Delete unused nodes
Upgrade subscription
Optimize infrastructure
Next Steps
Build with Your Node
Connect via API
Use gRPC or REST endpoints. See API Reference.
Open Lightning Channel
Required to send/receive payments. See Node Management Guide.
Mint Taproot Asset (LITD nodes)
See Taproot Assets Guide.
Advanced Features
Node Management - Advanced operations, liquidity, optimization: Node Management Guide
Automated Backups - Access from Backup tab: Security & Backup Guide
Monitoring - Performance monitoring and alerts in Overview tab
Developer Resources
Get Help
Documentation: docs.cometplatform.com
API Docs: Access from API Keys page
Support: Use Company ID (Account Settings) when contacting support
FAQ
How long does node provisioning take?
Under 5 minutes for most nodes for the whole process.
Can I change my subscription plan?
Yes. Upgrade or downgrade anytime from Billing page. Upgrades take effect immediately.
What happens if I run out of credits?
Cannot deploy new nodes. Existing nodes continue running. Delete unused nodes or upgrade subscription.
Is my data secure?
Yes. Non-custodial architecture. Node passwords and seed phrases never transmitted to or stored by Comet servers.
Can I migrate from self-hosted nodes?
Yes. Import existing seed phrase during node creation.
What if I forget my node password?
Use seed phrase to recover access to funds. Store both password and seed phrase securely.
Summary
✓ Created Comet Platform account
✓ Understood node types, credits, security model
✓ Explored dashboard features
✓ Deployed first Lightning Network node
✓ Accessed node credentials
✓ Learned credit system
✓ Discovered next step resources
Ready to dive deeper? See Node Management Guide for advanced operations.